

Chain Link Fence Installation Guide
Get Your Free Fence Quote Today!
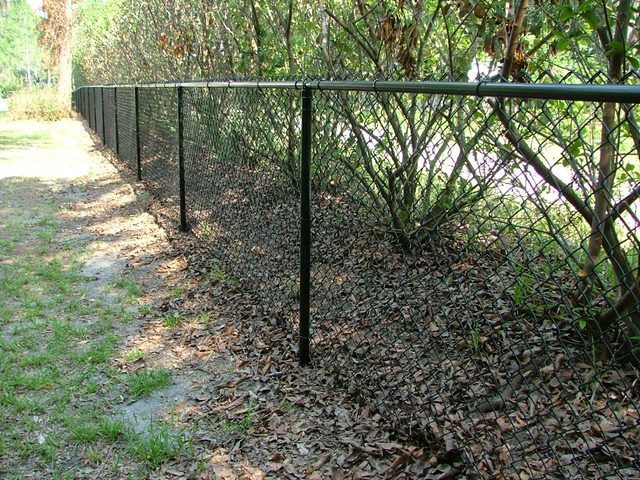
How to Install a Chain Link Fence
If you need to enclose a space, but a wood or vinyl fence isn’t for you or you don’t want to block the view from the street, you might be considering installing a chain link fence. These fences are made of linked metal and can be erected in any yard or garden. Chain link fences come in two basic styles: standard and privacy. Standard style has diamond shapes with open spaces between each diamond; it’s more decorative, but can make your yard more accessible to intruders. Privacy style has diamond shapes with solid spaces between each diamond and creates a wall that is difficult to climb over or see-through. Below are steps on how to install a chain-link fence.
Prepare the Site and Open the Trench
Before you start digging, check with your local government about any license requirements or permits that may be needed to do this kind of work. You should also make sure you have all the necessary tools before beginning the project. After ensuring all the necessary permits are in order, measure the length of the fence you will need to install. Take into account that your posts may not all be aligned perfectly straight and over time, they may shift somewhat. Once the length is measured, dig a trench at least two feet deep down along the entire length of the trench where you will be placing your post. To help line up your posts evenly and straight, you can use a string stretched out from one point to another.
To create additional support in the ground when installing chain link fence, add gravel if the soil is too solid or add sand to make it easier for post-hole diggers to go through.
DRIVE POSTS INTO THE GROUND
Once the trench is dug, add the gravel or sand if needed. Place a post in the trench and fill around it with soil, making sure that all of it will be covered by at least six inches on top of ground level. Drive your post into the ground using a sledgehammer or other driving tool. Repeat this step for each of your posts.
CEMENT THE FIRST ROW OF POSTS
Before you can install your first row of posts, fill any holes with cement. Let the cement cure for 24 hours.
To create an even line for the top of your fence at the same height on each post, use batter boards affixed to each post. These boards will be used as guides when you are attaching electric wires to the fencing.
ASSEMBLE THE FIRST ROW OF POSTS ON EACH SIDE
To build the first row, attach three vertical posts at their tops with metal brackets or other hardware. Once you have added two horizontal cross braces, but this section of fencing over your batter boards and slip it under your post so that it is resting on a level surface. Use the same hardware to attach it firmly to your post. Attach all subsequent sections in the same manner until you have completed one side of your fence.
ADD HORIZONTAL CROSS BRACES AND FENCING
To add more support, put horizontal cross braces at regular intervals along the length of your new section. Add fencing wire or mesh to the bottom. For a privacy fence, use fencing that has smaller diamond shapes with solid spaces between the diamonds.
ATTACH ANCHOR PLATES TO YOUR POSTS
Chain link fences are attached to metal “anchors” called plates which are bolted onto the posts. Attach them so they are lined up evenly with one another along your fence line. Staple or nail the fencing to the anchors to secure it in place.
Stretching the chain link fencing
You should stretch the top of your fence so that you have a continuous wall running from one anchor plate to the next involves drilling holes through the fencing and attaching it to your anchors with wire. This ensures the fencing will not come loose or get pulled out.
INSTALL GATE HINGES
Drill holes into one edge of both sections of the steel gate then cut a metal sleeve for each hole that is slightly longer than half an inch. Insert each sleeve into the gate and use it to mark where you need to drill holes on the other gate section so your hardware forms a perfect match. Drill your holes, install your hinges, and fasten bolts or wing nuts to keep your gate tightly closed.
ADD LOCKING PANELS FOR ADDITIONAL SECURITY
To add additional security, install locking panels between the first and second rows of fencing or in any other visible location. You can use a drill, wire cutters, panel clamps, and fence pliers to assemble these pieces quickly.
After you have any visible panels secured on your chain link fence, connect more horizontal cross braces as necessary for additional support. Finish with the top rail, then attach your fence gate.
If you choose to install privacy mesh instead of plain chain link fencing, you will need to build two rows of posts–one for the privacy mesh and one to hold the first section’s cross braces in place. You will also need a gate that is large enough to accommodate both sections when open. You can either build a double gate or cut your existing single gate in half and attach the two ends with hinges.
The last step is to attach additional vertical posts to complete your chain link fence installation. When you have completed all your sections, you can install a gate for easy access if needed. Make sure the gate opens and closes easily by making the opening at least six inches wider than the gate itself.
Chain link fence installation is a relatively simple process that takes minimal time and materials to complete. It is easy to install, secure, and affordable. Once you have installed your fencing, use the checklist below to ensure it is safe and ready for use.
– Check that all posts are secure and level
– Make sure wires are taut where needed
– Remove all batter boards.
– Attach locks on the gate if necessary
You’re now finished! Stand back and admire your work!
- Category: Uncategorized